
Hullo - well, about time I did another calligraphy post! I am sorry to all you patient people out there!
Today I will show you how I lay them out step but step so you can see the process from almost beginning to end... The first step I am showing you is when I have finished the layout design and it is ready for transfer.I always do it on transfer or graph paper as so much rubbing out in design stage means my paper gets too marked otherwise. Plus then you have a replica for repeat orders.

This is really about half way through the process as half the battle is in doing it to this point: working out the balance and presentation of layout and design.
As I said in my last post the key to layout is getting the emphases of the words in the correct place and then putting the decorations around it with biblical texts. With other styles of calligraphy it maybe that you can make the item fit the decoration, but with my style the decoration always accommodates the layout.

Once I have the design transferred to the sheet I then begin to ink it in – I use my Rotring Isograph for the work on the 100% rag. This is the type of paper I use, so technically it isn’t paper but rag!
I copy each text about 5 to 6 times depending on method. Onto tracing paper, then trace onto sheet, this is pencilled in and then inked in… I am careful not to rush this step although it is tempting! Then paint (or colour if the other style with Caran D’Ache pencils) and ink again…

The gold leaf section is built up as the colours are laid don and blended. I use palette (see here for my desk as I work from) of card from my gouache and blend light to dark as shown. I start at either end and work up or down. Gouache blends beautifully! The gold is done with a glue size, and layers (sometimes up to ten) are built up. Gold leaf is added right at the end when it is at the right level. I use transfer gold leaf in 23 carat and this very easy to use and my favourite!
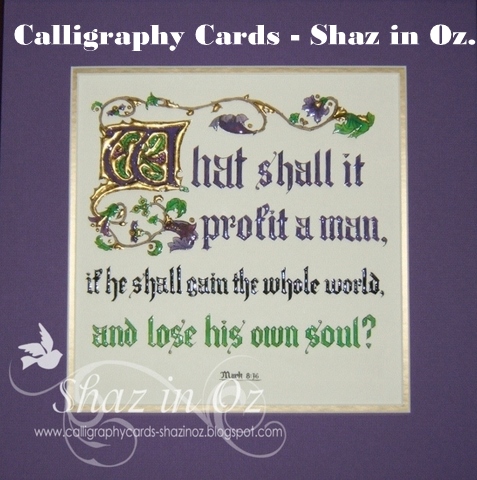
I pray much about each layout and also as I do the work that I will chose the right colours etc. This text was an order and they also ordered this one here. They are both done in the tabernacle colours which I use quite often of scarlet, purple, blue and gold.
I really love this verse - what a blessing to have the peace with God through what Jesus, His Son did for us on the cross - BY faith in Him...
Praise His name! and praise Him too for His gloriously beautiful Word!
Praise His name! and praise Him too for His gloriously beautiful Word!
God’s blessing on each of you,
Shaz in Oz.x


3 comments:
Oh Shaz - this is AMAZING! I could never aspire to work like that! What a God-given talent, and then using it for His glory! Go, girl! xx
Shaz, this is so beautiful. Just a true work of art so painstakingly done with love. This is something I would love to learn to do! I will be cruising your blog for pointers in the coming days!
Thanks ladies for your lovely words.. all the glory should go the One Whose word it is!
I am adding a comment below from Joyce she left for me - editing it so i can leave out an email address, she is fellow calligrapher and I really appreciate her words.. all the way from Ireland!
"Joyce across the Pond has left a new comment on your post "Calligraphy Step by Step Layout Method - Romans 5...":
This is a very interesting post Shaz....and great to see how you organise your work....I would work in the same kind of way for detailed stuff. I really do love your gilding....I've usually used Roberson's gold body but not that happy with the result...it's nothing like yours so need you to explain glue size to me...would you e-mail me, if you wish to share this information? I don't want you to feel you have to if you'd rather not. I said you inspired me and you do.....you are leading me in the direction of more detailed work...but, as you say....it is so time consuming. There are few who understand just how demanding this kind of work is. "
Post a Comment